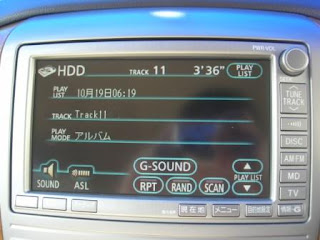
This screen is very similar to the DVD play list with the exception of the "G-SOUND" button, and the "PLAY LIST" buttons. The "G-SOUND" function is not operational here as it required real time communications to contact the G-Book Center (in Japan) to download music into the HU.
The current playlist will have a title with the date and time when this CD were recorrded. You can select the playlist that you want by touching the UP or DOWN button at the bottom right. If you want to get to specific playlist, touch the "PLAY LIST" button at the top right and it will bring you to this screen.
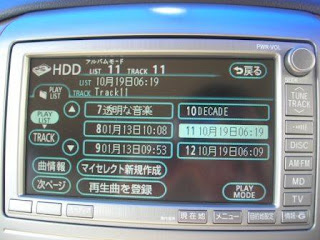
Each track in the selected playlist will be played sequentially and then the next playlist will be selected automatically. If you want to select a specific track in a playlist, "touch" the TRACK button (below the PLAYLIST button) and it will display the Track List as shown below.
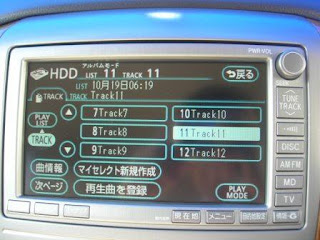
You'll noticed that in the above photo, each of the track will be just displayed as Track1, Track2 etc. If the source CD has the track information in the format compatible with the HU, the track list will display the actual track title accordingly. You can get to the details page on this track by "touching" the "曲情報" button (just below the TRACK button) and the following screen will be displayed.
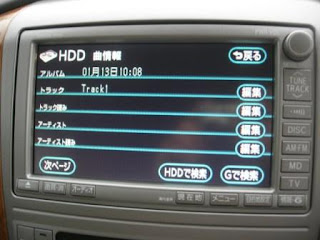
From the top, it will display the playlist title (アルバム), Track title (トラック), Track Read (トラック読み), Artist (アーテイスト), Artist Read. You can change the value of each line by touching the "編集" button to the right of each item. It will bring you to the Edit screen which I will cover later.
If you touch the "Next Page" (次ページ) button on the screen, it will bring you to the following screen.

From the top, it shows the Genre (ジャンル), G-Theme (G-テーマ - no idea what is this but probably tied to G-SOUND), recording source (録音ソース), date of recording (録音日). Again if you feel like changing the value of the genre, you can press the "編集" button mentioned previously and it will bring up the text editing screen like below.
You can enter the value in either Japanese or English language. The buttons at the bottom from the left to right are :
Hiragana (かな) as shown in the photo above.
Katagana (カナ) as shown below
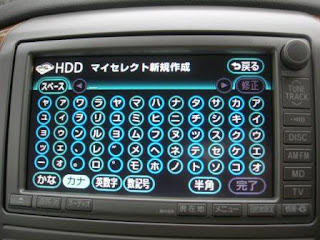 Small letter English character (英数字)
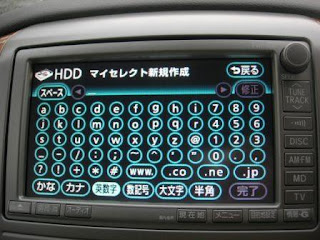 if you press the (大文字) button, it will bring up the English character page in capital letter
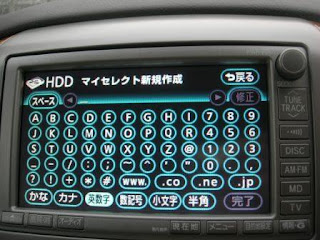
The default size of the English character is quite large so if you need more letters, you can touch the (半角) button to bring up the half-width English letter screen
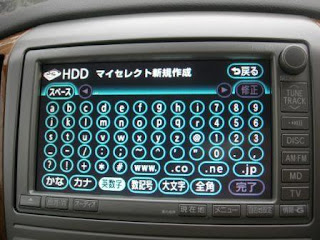 Finally you can press the (数記号) button to enter numeral and symbols screen as shown below.
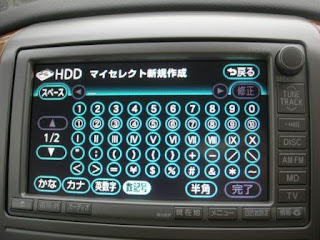
Press the DOWN arrow to move to the next page.
For each of these pages, you just touch the desire character to enter it, use the (スペース) button to insert a space and the Delete/Correction (修正) button to delete the character.
I normally will just change the title of the playlist and leave the rest of the track as it is.
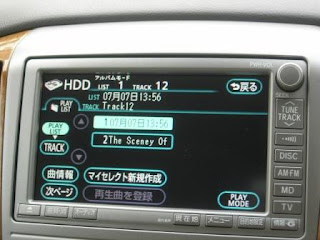
Noticed that even with half width English small letter, only a small portion of the playlist name is displayed in the PlayList screen. You'll need to touch on that playlist to see the details.
Finally, there is also a button called My Record (マイレクト) that you can use to compile a list of records of your preference. I don't use this feature so I won't go into the details. It just uses the same Edit screen to make changes to the play mode.
In the next post, I'll cover the video function of the DVD player.
Dear Mr Chan,
ReplyDeleteYour blogs has been really informative and really helped me in my search for a Giant. Now that I have one, am just wondering if you can tell me how to change and rename the playlist.
In your above posting, you have only explained how to change the tracks and not the playlist.
Thanks so much and keep posting bro!!!
Cheers!
YC
9w2kyc@gmail.com