Saturday, October 31, 2009

Delete Playlists Or Tracks from HDD

In my last post, I described how to initialize the content in the HDD. If you would like to delete only specific playlist or tracks from the HDD then you can do the following:

Touch the DISC button on the HU to acces to the HDD function. Once you activated the HDD function , it will automatically play the previously selected Playlist as shown in the following screen.

Toyota Alphard HDD Start Screen Touch the "PLAY LIST" button at the top right and it will bring you to this screen.
Toyota Alphard HDD PlaylistTouch the "Next Page" (次ページ) button on the screen, it will bring you to the following screen. Toyota Alphard HDD Playlist Next PageTouch the "Delete" (削除) button to bring up the "Playlist Delete" screen.

Toyota Alphard HDD Playlist SelectiionTo select the playlist to delete, just touch on the playlist to highlight it and the touch the "Delete" (削除) button. If you want to delete all playlist, touch the "Select All" (全て選択) button and then touch the "Delete All" (
全て解除) button. In either case, when prompted on the next screen, just touch "Yes" to confirm the deletion.Toyota Alphard HDD Playlist Delete Confirmation

Similarly, to delete tracks from the HDD, do the following:

Touch the TRACK button to bring up the Track List as shown below. Toyota Alphard HDD TrackListTouch the "Next Page" (次ページ) button on the screen to bring up the next page.

Toyota Alphard HDD Track Next PageTouch the "Delete" (削除) button to bring up the "Track Delete" screen.

Toyota Alphard HDD Track Delete The operation to delete a track is the same as those for deleting playlist as described above.

Just be careful with your selection. If you accidentally deleted any of the playlist or track, then you'll have to record them again.

Initialize the Content in the HDD

Previously I wrote a post on how to operate the HDD function on the new facelift model. Many Toyota Alphard owners like the fact that the HU has a 30GB hard disk so they can store their favourite songs into the hard disk. Normally the content of the hard disk is not erased when the cars are imported into here. Therefore there are a lot of Japanese songs stored in the hard disk. Many owners either don’t listen to Japanese songs or they don’t like to cluster the hard disk with songs that they don’t need. In this post, I will post instruction on how to erase the content in the hard disk.

If you want to erase the entire contents in the hard disk then here are the steps.

Start by pressing the G-Book (情報-G) button to bring up it main menu.
Toyota Alphard G-Book InfoTouch the “Next Page” (次ページ) button to access the next page.

Toyota Alphard Erase Personal Info Touch the "Erase Personal Information" (個人情報消去) button and it will bring up the "Initialize Personal Information" (個人情報初期化) screen.

Toyota Alphard Initialize Personal InfoOn this screen you can initialize the stored contents related to GPS location information, telephone phone book, songs recording etc. Touch the "Initialize" (初期化する) button to perform the initialization.

Toyota Alphard Initialization Confirm Touch the "Yes" (はい) button to confirmation the initialization process. It only take a few seconds to complete the initialization! Well I did it on my HU and I lost all the Japanese songs that I like! If you are not sure, then just touch the "No" (いいえ) button to back off.

In the next post, I will describe how you can delete individual playlist or track.

Thursday, October 22, 2009

Toyota Vellfire in the Lime Light

I was reading the headline in the Sun two days ago and saw that a Toyota Alphard is in the limelight for the wrong reason. The article was on Malaysian Anti-Corruption Commission (MACC) probing the allegation that the wife of the Health Ministry had received a Toyota Alphard as a birthday gift from a contractor who won a ministry tender. I am not much into politic so I am not really that interested in the motives and timing of this allegation. What interest me are the details that goes behind the allegation.

The allegation was that the wife of the Health Ministry had received a Toyota Alphard which cost RM574,884.10 in January 2009 as a birthday present from a Health Ministry construction contractor. The Sun article then reported that a check by them revealed that a Toyota Vellfire (not an Alphard) manufactured in Japan in February 2008 was imported as a used car and registered in January 2009. The reported purchase price was RM384,884.10 and the loan approved by a bank was for RM250,000.00. The report even quoted the actual engine specification and the chassis number of this car! The same article also reported in this news but the difference is in the actual selling price of the car. A check with the chassis number provided in the article confirmed that this car is manufactured in February 2008. However without the full model code I can't confirm if it is really an Alphard or a Vellfire as mentioned in my previous post.

The reason I was interested in this article was that during that same time period I was actively looking for my giant. At that time the 2nd generation Toyota Alphard and Toyota Vellfire were brought in for the first time by a few dealers to sell as a new car. As I was going in and out of the Cheras Autocity dealers' premises I saw a couple of unit of Toyota Vellfire then. Just to satisfy my interest I did asked for the price of the Toyota Vellfire 3.5 model and was quoted a price around RM570K. This is consistent with what was reported in that article. Well I guess what the reporter did not do is to find out how did the buyer managed to secure the car at 35% discount from the dealer price!

Due to the high price of these high end models there were only a handful of units were available but even then they get snapped up pretty fast by those who can afford it because of the exclusivity of owning one. Then about 3 months down the road, I heard from some of the dealers that they have stop selling these models as these model cannot be sold as new car under the Approved Permit system. Since the 2nd generation Toyota Alphard and Toyota Vellfire was only launched in May 2008 in Japan, it has not reached a minimum of one year period at that time to qualify as an imported used car. Therefore for a period of I think 3 months from April 2009 there were no dealers bringing in these models. Then in late July 2009 only some dealers started to bring in these models into the country again. By then the price of these model has started to drop as the demands pick up.

Back in late July 2009 I think the top of the line Toyota Vellfire was still going for about RM490K and recently in my last visit to Cheras Autocity, it has drop to about RM440K. Even the lowest spec model, the 2nd generation Toyota Alphard 2.4L model, has finally dropped below the RM300K mark beginning of this month.

In fact in the last visit to Cheras Autocity, the number of 2nd generation Toyota Alphard/Vellfire on display has actually out-numbered the 1st generation Toyota Alphard. Look like the dealers are now focusing on selling higher priced model to try to catch the demands while it is still hot.

Sunday, October 18, 2009

ICE Setup Photos - Part II

This is the 2nd part of the photo sequence of my ICE installation process.

Step 14: Before the center console panel is removed to access to the wiring behind the HU.

Step 15: Once the panel is removed, released the two screws on each side of the HU and the HU can be detached as shown

Step 16 - Look at the cluster of wiring behind the HU. Not easy to identify which is which if you are not familiar with the wiring!

Step 17 - The default wiring will turn off the LCD when the car is on the move. Jumpered the wire on this switch to by pass this feature.

Step 18 - Connect the wires from new DVD player to the wire-clusters at the side that run to the side speakers and the rear speakers.
Step 19: Lay out all the wires that connects the DVD player, amplifier and the speakers below the console box between the two front seats

Step 20: Mount the DVD player. My original plan is to mount the player inside the tray underneath the center console. However the DVD player is too wide to fit into the tray so I decided to mounted it here instead.

Step 21: To power the DVD player, the installer tap the power from the back panel behind the center console box which provide power source to accessories like external DVD/CD player or game console.

Step 22 - Here is a close up of the power source from the back panel.

Step 23 - Mounted the Bazooka tube subwoofer behind the 3rd row seats. This arrangement allow me to remove the subwoofer (if needed) to maximize the space at the rear of the car.

Step 24 - I also installed a voltage meter next to the battery to give me reading of the voltage that is supplied to the car.

Hope these photos give those who plan to ICE their giants a sense of what is involved in such an installation.

Cheers

Saturday, October 17, 2009

ICE Setup Photos - Part 1

Here are the photos I took during my ICE installation process. Enjoy.
Step 1 - The driver seat is removed

Step 2 - The driver side side step is removed

Step 3 - The Amplifier is mounted below the driver seat

Step 4 - The seat bracket is reinstalled Step 5 - The driver seat is reinstalled. To access to the amplifier, just slide the driver seat to the front.

Next is to replace the door speakers and the tweeters.

Step 6 - After the door panel is removed. The main speaker is now visible.

Step 7 - The speaker is removed. Prepare to install sound damping materials on the front doors.

Step 8 - Here is a comparison between the original speaker and the new component speaker. The original speaker is make of thin paper while the new component speaker is make of aluminium die-cast and micro fiber composite cone.

Step 9 - Sound damping materials installed. I used the following sound damping materials Step 10 - The sound damping materials used on the two front doors.

Step 11 - Re-tape the original plastic cover

Step 12 - Install the new component midrange speaker

Step 13 - This photo shows the size of the original tweeter. Since the new component tweeter is too big to fit into the original location, it is mounted on each side of the dashboard as shown below.

I planned to mount the tweeter onto the pillar in future.

Step 14 - New speaker cable is ran from the new DVD player to the tweeters on the dashboard.

I will post the rest of the photos in the next post.

My ICE Setup

When I started planning to improve the sound systems (the local like to call it to ICE the car) of my giant I initially was planning to bring over the ICE equipment I had in my old car. But then I was conscious of the space it would take up to mount all the equipment given the size of some of my old ICE equipment, I decided to take a different approach. I started by reviewing what I need and where potentially I can put each of the equipment before I start on acquiring them.

My priority on my ICE setup was to have audio and video capabilities coming from a single source. Since I have already have an 8-inch LCD in the HU and another 9-in roof-mounted LCD, All I need is to get a better source to replace the radio and CD/DVD functions on the HU. Given that the standard HU is fully functional I decided to take a slow approach to acquire the equipment.

On one of the trip to Singapore I managed to buy a DVD Receiver and a 5-channel amplifier at steeply discounted price. The only thing I brought along from my old car is the subwoofer.

My ICE setup includes the following:

Pioneer DEH-P4150UB DVD Receiver (bought from Singapore)
Pioneer TS-C171PRS Component Speakers (bought from the ICE installer)
Eclipse XA5000 5-channels amplifier (bought from Singapore)
Bazooka 8-inch tube subwoofer (brought over from my old car)

Overall the new sound system setup is pretty decent compared to my previous setup. The major contributing factor is the TS-C171PRS component speakers. The rich natural midrange a wide sound staging with very clear and sharp tweeter output. The smoothness and linearity of the sounds is so much better than the Eton A160 I used to have in my old car. I think there is still room for improvement as the source (DEH-P4150UB) is a DVD receiver which never be able to provide the pure sound output of a Component CD Receiver. Since I don’t really use the DVD function that often, I might replace the DVD receiver with a component CD receiver. I haven’t decided which model to go with yet but I have narrow it down to either the Pioneer DEH-P80RSII or the Alpine 9887.


In the next post I will share some photos of the installation process.

Tuesday, October 13, 2009

The Myths About Maintaining Toyota Alphard

During the last TT I had several questions from fellow AOC members on the maintenance of our giant. They wanted to know specifically where I send my car for service and if there is any specific knowledge needed to service our giant. Well it seems that there is this myth that since Toyota Alphard is a fully imported (used) car then there might be some specific requirements to service the giant. Another myth is that since this is the flagship minivan than the quality of the car should be at par or better than those assembled locally hence there shouldn't be that much annoying noise coming from the car!

The 1st generation Toyota Alphard uses the 2AZ-FE engine on the 2.4L model and the 1MZ-FE engine on the 3.0L model. The 2AZ-FE is the same engine used in the local Toyota Camry model, 2.4L model of the 2nd generation Estima, Harrier and Ipsum. There is no 3.0L model of Toyota Camry available locally but the same 1MZ-FE is also used in the 3.0L model of the 2nd generation Estima and Harrier for a long time.

Since the local distributor of Toyota, UMW, doesn’t accept imported used car for service, which means the owners of these imported used car has to send their cars to other workshops. Actually because of this reason there is a mushrooming of workshops specialize in servicing imported used car from Japan as well.

On the higher end, there is workshop like Vision Motorsport in (Sunway and Bangsar) that carry the Tom's after market performance product and has servicing agreement with the principal which is Toyota Motorsport in Japan. They specialized in servicing and selling after market performance parts for Toyota cars. Of course their charges will be much higher as they used only original parts from Toyota or from Tom’s. They even have come up with service package for imported Toyota model like Alphard, Estima and Harrier that offer comprehensive maintenance for these cars which runs into thousands of ringgit on per annum basis.

There are also other workshops that specialized in servicing only Toyota vehicle such as Hong Lee Motors Sdn Bhd. This workshop made a name for taking the risks to start the servicing of high end Toyota model like Lexus LX470 or Lexus LS430 when it was brought into the country back in the 1990s. They also have the diagnostic equipment for Toyota model while providing reasonable maintenance charges. This attracted a long list of loyal customers who bought imported used Toyota car and find this workshop as a good source for maintenance service.

At the low end of the scale, there are many smaller workshops that provide cheaper alternative as they focus on cheaper labour charges and give the owner the options to bring their own spare parts. In fact there are AOC members who buy their own spare parts and send it to these so called “bawah pokok” (refer to workshop without a proper shop outlet) mechanic for service.

Even my own mechanic has been doing servicing for imported Toyota car for one of the used car dealer near his shop since 1990s. There is really nothing special about the 2AZ-FE and 1MZ-FE engine that required specialized knowledge to service it.

On the other hand, there is also some accessory shops that has branded themselves as a one-stop-shop. What they will do is that for those customer who buy accessories (well at some quantum) they will help to arrange to have the giant also serviced by one or two nearby workshop that they trusted.

What is important is that these workshops should follow the maintenance specification that Toyota specified in their workshop manual. For example Toyota specify that the viscosity of the engine oil for the 2AZ-FE engine should be SL 10W-30 while the viscosity of the engine oil for the 1MZ-FE engine should be SL 5W-30. Whether the owner uses mineral, semi-synthetic or fully synthetic oil is more of a maintenance interval preference rather than the quality of the oil. Similar another example would be that the quantity of engine oil required for just engine oil change for the 2.4L model is 4.1L and 4.3L if the engine oil and oil filter are changed together. The 3.0L model would require 4.5L and 4.7L respectively.

The second myth is really related to the question of “what are those sounds that come from the front or from the back when I drive my car”. The steering rack on the Toyota Alphard and Estima is known to have quality issue. In fact during my search for the giant I have spoken to some dealers and they admitted that they do stock some spare steering racks in case the buyer of these imported used car claim warranty from them. Many owners did post in the AOC forum that when they turn the steering during the start of the day they hear some squeaking sounds from the front. This is very common and from the description of those who experience it, it seems like the problem could be emanating from the steering knuckle.

The question than can this problem can be resolved all together. Yes I think it would be possible but then it would take quite a bit of time and effort for the mechanic to pin-point the root cause and fix it. My take on this is that if the steering knuckle is not really broken, don’t fix it. In fact on my car, there is this one time squeaking sound coming from the steering knuckle whenever I turn the car steering for the first time. After that the sound won’t appear anymore as I drive for the rest of the day. I come to live with it as it is not affecting my drive at all.

For those who are driving a 4WD model, one of the common complain is they can hear some squeaking sound coming from the back when they drive the car. Since 4WD model has two drive shafts at the rear, if there is any likely hood of anything generating the sound, it is most likely coming from the drive shafts. It is not easy to isolate exactly which component of the drive shafts that make this sound so again time and effort is required to really resolve this.

Would these symptom described above impede the driving performance of the car? Would things fall off the car if it is not fixed? Of course it is a resounding NO. Toyota is known for it reliability and it is inconceivable that a Toyota Alphard would suffer such a fate given than it is the flagship minivan from Toyota. A bit of sound can be a nuisance at first but should not be an alarm for concerns for the owner on everyday driving unless it has really deteriorate so bad the sounds come on consistently.

On the subject of spare parts it is interesting that even though the model like Toyota Alphard, Estima and Harrier are not imported directly by the local Toyota distributor, because of the volume of cars brought into the country by the parallel importer over the years, the local spare parts suppliers understood the supply and demand, and actually carry most of the spare parts for these models. Therefore there shouldn’t be any concerns in terms of availability of spare parts as there are several major spare parts suppliers for Toyota car in the country.

How To Tell If It Is A 2WD or 4WD Toyota Alphard?

One interesting question I got asked very often when I met with fellow AOC members is “how to tell if a Toyota Alphard is a 2WD or 4WD model?”

Well from the exterior there is no indicator to tell you so. If you don’t mind bent down and look at the undercarriage, you might find the rear axle and the rear drive shafts connected to the rear wheels on a 4WD model.

The other way is to look at the model code. In this post, I have briefly mentioned that the first 5 alphanumeric of the model code will tell you whether the car is a 2WD or 4WD model. I thought it would be easy if I put up a simpler table below to help you to differentiate between a 2WD and a 4WD model.

Model

Code

Engine Code

Grade

Transmission

Type

MNH 10W

1MZ-FE (3.0L gasoline)

MZ/MS/MX

Front Wheel

Drive

ANH 10W

2AZ-FE (2.4L gasoline)

AS/AX

Front Wheel

Drive

MNH 15W

1MZ-FE (3.0L gasoline)

MZ/MS/MX

Four Wheel

Drive

ANH 15W

2AZ-FE (2.4L gasoline)

AS/AX

Four Wheel

Drive


As mentioned in this post, the model code is printed on the chassis plate. For pre-facelift model, it is on the left side of the engine bay. For new-facelift model, it is on the door pillar at the passenger side.

Look at the above table and if the model code is 10 then it is a 2WD model. If it is 15 then it is a 4WD model. Very straight forward to do the identification.

Being able to identify the correct year and model can really help a potential buyer in getting the right car for him/her. During the last TT as the members are going through each other car, it is unavoidable that the question of how to you determine the year of the car comes up. It is very unfortunate that one of the long time member discovered that a new member has bought a 2002 model that was advertised as 2004. That mean that member has paid more money for that car than it is worth.

I still don’t know how the AP process actually work but it is obvious that whoever approved the assignment of AP to this car didn’t check what year this car is really manufactured in, or that process doesn't have such a need. Anyway, if that person really follows my post here, then he would know right away this is 2002 car and probably reject the car because it is way over the five year periods validity of that AP. Anyway it is too late now and I don’t know if there is any way for this new member to make his claim against the dealer.

I started this blog with the intent to help those buyers who are interested in acquiring a Toyota Alphard. I really wish that those who are looking for their giant at least have a look at some of my postings related to this topic so that they don’t get into such sad situation ever.

Saturday, October 10, 2009

AOC October TT

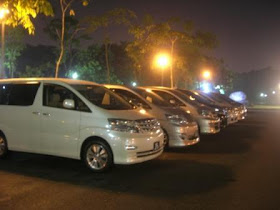
Last night a total of 29 AOC members gathered at Car Park F, Bukit Jalil for an impromptu TT gathering. Impromptu in a sense that it was organized in a very short time frame and the original plan was to allow regular AOC members to meet up with one of the AOC member from Kelantan who is visiting Kuala Lumpur. Due to the last minute announcement (I only got an invite through SMS) the organizer was not expecting a big turnout. However it ended up being the largest gathering of AOC members since May 2009. A total of 28 Toyota Alphards gathered together this time exceeding the previous record of 25 cars.

From 8:45pm onward, the members started arriving and everyone sat down to chat with each other. Even though this is not planned as family event, many members brought along their spouses so while the members are having lively discussion among themselves the spouses also took the opportunity to mingle among themselves. It was encouraging to see many new AOC members join us for this gatherting. And it is nice to see some long time members who hasn't been attending recent TT turn up for the gathering.

Toyota Alphard TT Gathering 1Toyota Alphard TT Gathering IIWell since the car park is not properly lighted, the photo come out blurred as my old faithful digital camera don't work well.

Half way through the lively chat some members wanted to have a look at each other cars so everyone headed toward the cars.

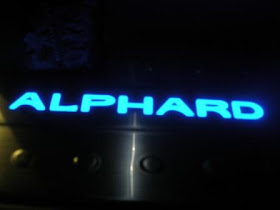
Toyota Alphard Car Line Up 1Toyota Alphard TT Car Line Up II The main attraction again is none other than the two “show” cars. One has the distinction of being the only Toyota Alphard in the country to have 22-inch rims. Of course he has many other nice features added such as 6 projector lamps and a collection of VIP accessories. The owner was busy answering questions like how is the ride with the 22-inch and where to get those accessories. The other is the only Toyota Alphard with a set of air suspension. Of course those lucky AOC members get to see the air suspension in action on that night. Also of interest is the lighted door step and the lighted arrow on ths side mirror of one of the member.

Toyota Alphard Side Step LightedToyota Alphard Side Mirror Lighted Arrow
I was kept busy the whole time as I was interacting actively with many members. I chatted with one AOC members on various topics. I also showed one member how to operate the hands-free function, maintenance items and HDD songs maintenance. I assisted one member to confirm the exact model specification of his car. I then show another member how to recognize through the model code whether a particular car is a 2WD and 4WD. Overall I was very happy with this opportunity to be able to interact with the other AOC members since the last gathering.

Since the Car Park F is rather dark so it was not easy to take a group photo. Again the members improvise and lined up a few cars with the light switched on. That provided enough lights for those with camera to take a group photo.Toyota Alphard TT Group Photo
After the group photo, some member starts to leave while other stay back on more chit chats and at time technical discussion and the TT officially ended around 11:50pm when the last group left the Car Park.

If you want to see more photos on this TT, please check out the AOC website.

Looking forward to bigger turn out of AOC members for such TT.

Cheers

Wednesday, October 7, 2009

Another Break In Incident!

I was walking back from my car to the lift when I bumped into my neighbor. He was telling me that there was another attempt to steal another Toyota Alphard belongs to another resident in my condo. I then checked with the guard on duty and he was relating to me that someone has attempted to steal that giant around 5am in the morning. The thief broke the small triangle glass next to the side mirror with the intent to open the door and probably wanted to steal the car just like in my case.

However the sounds of breaking of the glass must have alerted the guard on duty and the thief ran away in a getaway car. The guard then uses his walkie-talkie to alert the guards at the condo entrance to try to block the getaway car. But then the thief is so desperate to escape that he broke the barrier and drove off the compound.

I was hoping to catch up with the owner of that Toyota Alphard to share my experience on my break-in attempt. However he had sent his giant to repair the triangle glass so we didn’t have a chance to meet up to discuss the incident.

It looks like the guard is doing his duty this time but still it puzzled me how the thief manage to drive the car into the compound. One theory now is that the thief actually knows someone in the compound and uses the excuse of visiting to come in. He will be staying with his “friend” and then make his move in the morning.

I noticed this giant is seldom used so the thief must have been eyeing it for quite some time. Since the owner of that giant has made a police report, I really hope the police will do thier work to catch the thief this time. The guard did mention that their camera has managed to capture the face of the thief when he drove pass the barrier. I hope the police will be able to track down the thief and put him behind bar.

So far two giants already been targeted by this thief in his attempt to steal. If the thief is still at large I really don’t know if he will target the other two giants in our compound. Let hopes this will never happen again.